Contest Briefing - Route YELLOW
 1. Get yourself positioned on the runway at Buochs LSMU ready for takeoff. Flying the tow is one of the most challenging things about soaring. Remember to check that your spoilers are closed and start your timer by clicking on the green button. Click the brakes button to start the takeoff. On takeoff use the stick to get the low wing up and the rudder to keep it straight. Get the nose up and level as soon as possible. Remember, you are balanced on a single main gear and you must fly the plane to keep it level. A trick to flying on tow is to keep your wings at exactly the same bank angle as the towplane and make very small corrections. If you get out of position just bank slightly towards the towplane and then level up. You will drift back into position.
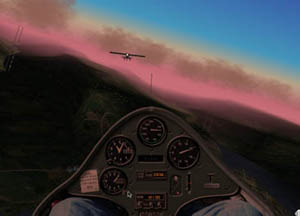
2. The towplane will fly a gentle left turn after takeoff. You may come close to some of the nearby mountains but the towpilot is very experienced and will clear the ridges. Stay on tow until you feel that you are at a high enough altitude, 2,500 feet above the field should be sufficient, and hit the space bar to release yourself from the tow line. Don’t forget to retract your landing gear as the extra drag could make a difference in your elapsed time.
 3.The initial leg of the course is west from the field at Buochs. The turnpoints are listed on the race map (circles). Your job is to steer the glider through the radio tower "gates" along the route. (these "gates" are in fact holographic light beams - one of the gadgets we own since the Orlyonok mission).
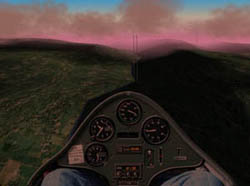
Now your challenge begins. You must balance the best possible speed against using up your altitude. Place the nose down to keep up a good speed. You will hear the audio variometer emit a steady tone indicating that you are descending. Fly as fast as you dare while watching your altitude. If you are getting low slow to best glide speed of around 58 knots. If you are getting down to less than 1,000 feet above the valley floor start planning your landing. Hopefully very soon after you start out you will encounter a thermal or rising air column indicated by the audio variometer changing from a steady tone to a beeping one or intermittent one. If you are lucky enough to encounter rising air you can decide to circle in it to gain altitude or just slow down to take advantage of the lift. If you are low you should try circling at a slow speed until you gain enough altitude to go on. Listen to the beeping. If it gets faster you are near the core of the thermal in the fastest rising air. Try to stay in that if you can. Remember though, you are not making progress across the ground while you circle so decide when you are high enough to go on. Try to leave the thermal in the direction you want to go.
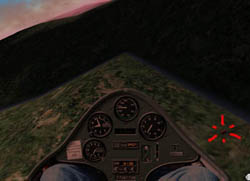 4.The CEO chalet turn point is your second check (and first turn) point. You will turn to the south or your LEFT as you approach the chalet, where the valley turns sharpy to the left. Look for a small radio tower on the right hand side of the chalet. You MUST go around the RIGHT side of it. If you are comfortable with taking a screen shot while looking out your canopy, selecting the right view in XP, then do so. It may come in handy if there is any kind of dispute about rounding the corner. (The picture shows the turn of the RED route. For the YELLOW route, you will have to see the house on the LEFT cockpit side!).
5.The Valley Gate 2 is your third check (and second turn) point. Pass the gate at the end of the valley, and make sure you have enough altitude to jump over the mountain rim to your RIGHT (south). Once you were over the rim, you enter the valley of Meiringen. There, you turn right again (heading west now), and follow the valley downstreams. In the middle between your entry point and Meiringen, there is another gate:
6.The Valley Gate 3 is your fourth check point. Pass the gate (located at the north side of the valley) and head for LSMM Meiringen, where your race is finished.
7.The FINISH line / Arrival is situated in Meiringen airfield. You stop the counter when you pass over the hangar.
rev. 1.0 (20011-LSMU) / ©2000, dESPair, Snidley/Habakuk