| dESPair PATHy 1.0 - Tutorial
Navigation / Controls in PATHy 1.0 | INDEX Back To HabakukSoft
| |
The left most window is the empty flight plan list. It is titled “FlightPlan”. Here will the numeric leg data appear, and it is from this window that you can save and print the flight plan. STEP 1 : File the flight Your first step in flight planning will always happen in this window, as you first type in the trip name, pilot in command, aircraft callsign, average fuel consumption of this aircraft, and the proposed departure time and date. At the bottom of the window you see four empty fields. Here you will appear the calculated total time, distance and burnt fuel for the legs you have selected (if you have supplied speed and average fuel consumption values). At the very bottom of the window, you find the “Print Plan” and “Save file” buttons. They do exactly what their caption suggests... |  | |
(for Multi functional display). The top part of the window is covered with the display zone. Here you will see the airports, and here you will work if you want to “paint” legs, instead of selecting them. At the bottom of the page you find many buttons and switches. We will discover all the knobs and switches during our tour. Far left are the center field, the zoom popup and the scroll arrows. All these influence the display coordinates. Left of the middle you find a row of check boxes. Selecting or deselecting them decides over what is getting drawn. The uppermost checkbox is separated - it is the switch to activate manual leg planning. More about that later on (VFR flights). Right of the middle you find a couple of empty edit fields. This is where you enter the leg waypoints, if you don’t draw them. And to the far right, you find some functions behind push buttons. Printing does exactly this, “New Plan” deletes the currently active flight plan, and starts the planning process all over again. The arrow buttons let you scroll the displayed area. >> You can scroll the map with the arrow keys too! | 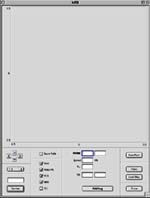 | |